


Your shopping cart is currently empty.
Table of Contents
- What Is Hat Logo Sizing and Why Does It Matter?
- What Is the Standard Hat Logo Size?
- What Are the Standard Logo Sizes for Different Hat Placements?
- Where Should Logos Be Placed on Hats?
- What Is the Minimum Embroidery Logo Size for Hats?
- Line Thickness and Detail Limits
- How Do Different Hat Types Affect Logo Sizing?
- Baseball Caps and Fitted Hats
- Trucker Hats and Dad Hats
- Bucket Hats, Beanies, and Specialty Styles
- Recommended Logo Dimensions for Hats
- What Are Common Hat Logo Placement Mistakes?
- Custom Hat Branding Ideas for Businesses
- How Much Does Logo Size Affect Production Costs?
- Start Designing Your Custom Branded Hats Today
Share this Media
Published on 05 Mar 2026
By Apparelbus
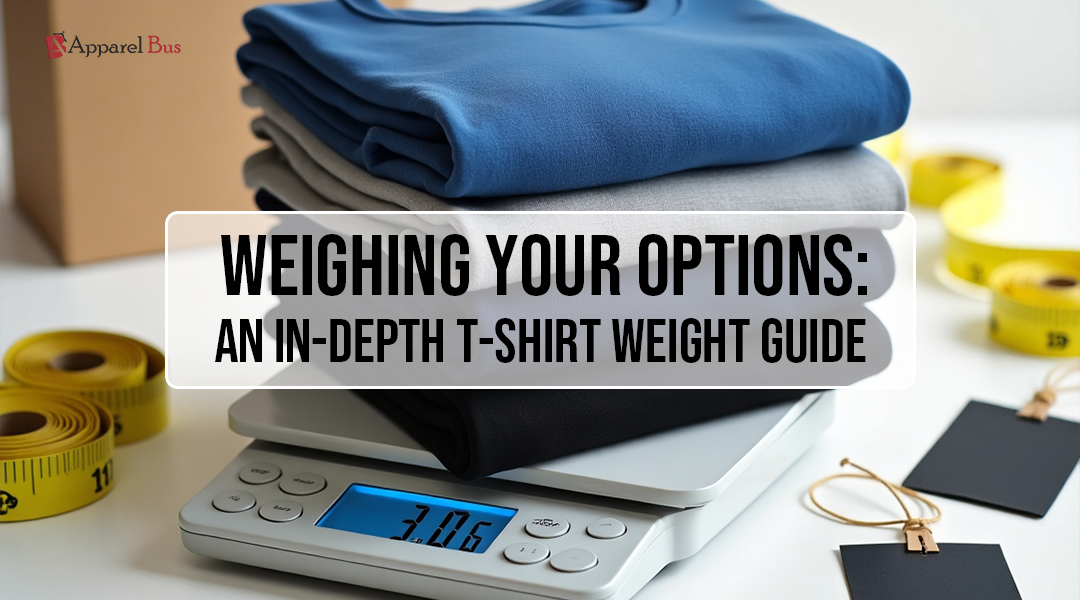
Hat Logo Size and Placement Guide for Custom Branded Hats
Getting the logo size right on custom hats isn't just about picking random numbers. It's about understanding embroidery limits, hat shapes, and where to place your design. Whether you're branding for your business, making promotional giveaways, or designing retail merch, this complete hat logo size guide will teach you everything about logo sizes, placement ideas, and production needs to ensure your branded hats look professional every time.
What Is Hat Logo Sizing and Why Does It Matter?
Custom hat logo dimensions directly affect how visible and professional your brand looks. A properly sized logo grabs attention from far away while staying clear up close. But hats are different from t-shirts or other clothing because of their curved surfaces, different heights, and panel structures. Crown height is how tall the front of the hat is. Highly structured hats give you more room for taller designs. Low-profile dad hats need smaller, shorter logos. Most caps have 5 or 6 fabric panels that meet in the center, creating seams. These seams can mess up your logo if you're not careful about placement.
The front panel curves outward, so logos need proper backing during stitching to prevent warping. Understanding these basics helps you choose the right sizes before you order and avoid costly mistakes.
What Is the Standard Hat Logo Size?
![]()
The standard hat logo size for front center placement is 4 inches wide by 2.25 inches tall for structured caps. This size works for most baseball caps, snapbacks, and trucker hats. For unstructured dad hats, reduce to 3.5-4 inches wide by 1.75-2 inches tall. Side panel logos should measure 2-2.7 inches wide by 1-1.25 inches tall. Back placement typically ranges from 2.5 to 3.5 inches wide.
|
Placement Location |
Width |
Height |
|
Front (Structured Hats) |
4–5 inches |
2–2.25 inches |
|
Front (Dad Hats/Unstructured) |
3.5–4 inches |
1.75–2 inches |
|
Side Panel |
2–2.7 inches |
1–1.25 inches |
|
Back Center |
2.5–3.5 inches |
1–1.5 inches |
|
Back Arch Text |
4–4.25 inches |
0.5–0.75 inches |
|
Minimum Text Height |
N/A |
0.2–0.25 inches |
What Are the Standard Logo Sizes for Different Hat Placements?
The front panel is your main branding spot, usually fitting designs that are 2 to 2.25 inches tall and 4 to 5 inches wide. Side panels are smaller at 1 to 1.25 inches tall and 2 to 2.7 inches wide. Back placement stays within 2.5 to 3.5 inches wide, depending on whether you're adding curved text or a centered graphic.
Front Panel Logo Dimensions
[Image Suggestion: Close-up diagram of hat front panel showing logo placement zone, distance from brim (0.5-1 inch), and clearance from eyelets]
The front center is where most people put their main logo. The standard embroidery area is about 4 inches wide by 2.25 inches tall for structured caps.
High-Crown Structured Hats
-
Can handle designs up to 2.3 inches tall
-
More vertical space for bolder logos
-
Perfect for stacked text or vertical elements
Low-Crown Unstructured Hats (Dad Hats)
-
Maximum height: 1.75-2 inches tall
-
Width: 3.5-4 inches recommended
-
Lower profile can't support tall designs
-
Keep designs shorter and wider
Width Guidelines
-
Balanced look: 3.5-5 inches wide
-
Horizontal text/emblems: 4.5-5 inches
-
Minimalist icons: 2.5-3.5 inches
-
Always center between panel seams
Side and Back Placement Sizes
![]()
Side Panel Specifications
-
Height: 1 to 1.25 inches
-
Width: 2 to 2.7 inches
-
Best for website URLs, small emblems, icons
-
Position on the front-side panel near the temple area
Back Arch Text
-
Width: 4 to 4.25 inches
-
Height: 0.5 to 0.75 inches
-
Curves above the back strap
-
Ideal for names, slogans, team info
Back Center Graphics
-
Width: 2.5 to 3.5 inches
-
Height: 1 to 1.5 inches
-
Positioned above the adjustable strap
-
Keep designs simple for durability
Where Should Logos Be Placed on Hats?
Strategic logo placement locations on hats completely changes how visible and impactful your branding is. Front center delivers maximum visibility, side panels offer subtle modern branding, and back placements add personality or extra messaging. Each location serves different branding purposes and appeals to different audiences.
-
Front Center - Maximum Visibility
The front center is the most visible spot on any hat. This location ensures your logo faces forward when worn, creating instant brand recognition. Position logos centered between the air holes, typically 0.5 to 1 inch above the brim for the best look.
This placement works perfectly for corporate branding, promotional giveaways, sports teams, and any situation where brand visibility matters most.
-
Side Panel - Modern Subtle Branding
Side panel spots give you subtle, fashionable branding that younger audiences love. This location works great for small logos, hashtags, website URLs, or minimalist designs. The placement usually sits on the front-side panel, offset toward the wearer's temple area.
Fashion brands and streetwear companies prefer side embroidery for its modern look. It lets the front stay clean or feature different design elements, creating a more sophisticated vibe than traditional center logos.
-
Back Placement - Secondary Messaging
Back arch placement curves text or small graphics above the closure mechanism. This spot is perfect for names, slogans, team identifiers, or motivational phrases. The curved text follows the hat's natural shape while staying readable from behind.
Under-brim embroidery is less common but offers unique branding opportunities. This hidden spot shows when someone takes off the hat or adjusts the brim. Brands use it for special messages, limited edition markers, or subtle authentication details.
What Is the Minimum Embroidery Logo Size for Hats?
The minimum embroidery logo size for hats is 0.2 to 0.25 inches tall for text. All line elements must be at least 1mm thick (about 0.04 inches). Anything smaller creates problems with stitching quality, readability, and durability. These limits exist because of physical constraints related to needle diameter and thread thickness.
Text Size Requirements
![]()
Sans-Serif Uppercase Letters
-
Minimum height: 0.2 to 0.25 inches
-
Simpler letter shapes stitch more cleanly
-
Best for maximum readability
-
Most reliable for small branding
Lowercase and Script Text
-
Minimum height: 0.25 inches
-
Smaller proportions need extra height
-
More complex shapes require larger sizing
-
Consider uppercase alternatives for tiny spaces
Serif Fonts and Decorative Text
-
Minimum height: 0.35 inches
-
Decorative strokes need more thread coverage
-
Complex shapes demand larger dimensions
-
Often better as patches for small sizes
Small Symbols and Marks
-
Trademark ™, registered ®, copyright © symbols often fail
-
Usually too tiny to read when embroidered
-
Better to omit for a cleaner appearance
-
Readable logo beats a technically accurate, illegible one
Line Thickness and Detail Limits
![]()
Minimum Stroke Requirements
-
All lines: 1mm minimum width (0.04 inches)
-
Thinner lines cause gaps and skipped stitches
-
The thread pulls out after washing
-
Design simplification is often necessary
Stitch Density Standards
-
Industry standard: 0.16 to 0.18mm between stitches
-
Higher density = richer colors, longer production time
-
Lower density = fabric shows through, lower cost
-
Balance quality with budget needs
Design Complexity Guidelines
-
Simple logos: 1,000-5,000 stitches
-
Medium complexity: 5,000-10,000 stitches
-
Detailed designs: 10,000-15,000+ stitches
-
Rule of thumb: ~2,000 stitches per solid square inch
What Works vs What Doesn't
Good for embroidery: Simplified clean designs, vector artwork, solid color fills, clear outlines, bold shapes.
Bad for embroidery: Fine intricate details, gradients or shading, photorealistic images, thin delicate lines, complex textures
How Do Different Hat Types Affect Logo Sizing?
Different hat styles handle logo sizes differently based on their construction and intended use. So, let’s take a look at the main types and how they affect logo placement and dimensions.
Baseball Caps and Fitted Hats
Baseball Caps
Baseball caps are the most popular style with structured crowns and curved brims. They offer consistent, reliable embroidery surfaces that work with standard logo dimensions. Standard baseball caps fit front logos measuring 2.1 to 2.25 inches tall by 4 to 4.5 inches wide. Side panels support smaller designs around 1 inch tall by 2.5 inches wide. Back placement works for arch text spanning 4 to 4.25 inches or centered graphics up to 2.5 inches wide.
Fitted Hats
Fitted hats are sized rather than adjustable and typically feature structured crowns similar to baseball caps. Logo dimensions match baseball cap standards at 2.1 to 2.25 inches tall by 4 to 4.2 inches wide on the front panel. These hats often target sports and streetwear markets where bold, prominent branding performs well.
Trucker Hats and Dad Hats
Trucker Hats
Trucker hats combine foam front panels with mesh backs, creating unique branding opportunities. The foam panel gives you excellent embroidery space, often slightly larger than standard baseball caps. Front logos can reach up to 5 inches wide, though staying within 4.5 to 5 inches maintains better proportions. The mesh back panels don’t support embroidery, limiting branding to front and side foam sections.
Dad Hats
Dad hats feature low-profile, unstructured crowns that create a relaxed, casual aesthetic. These hats limit front logo dimensions to approximately 4 inches wide by 1.75 inches tall. The reduced crown height means taller designs look disproportionate or extend too close to the air holes. Conservative sizing maintains the laid-back style dad hats are known for and ensures the logo doesn’t overpower the hat’s understated design.
Bucket Hats, Beanies, and Specialty Styles
Bucket Hats
Bucket hats offer more horizontal space due to their wider, cylindrical crowns. Front embroidery areas measure approximately 5 to 5.5 inches wide by 2 inches tall. The increased width accommodates longer wordmarks or wider logos. However, bucket hats’ soft, unstructured fabric requires careful stabilization during embroidery to prevent puckering and distortion.
Beanies
Beanies offer front embroidery on the cuff, the folded portion that frames the face. Cuffed beanies fit approximately 5 inches wide by 1.75 to 2 inches tall. Uncuffed or slouchy beanies provide similar width but potentially more vertical space up to 3 inches. Beanie fabric stretches significantly, so logos must account for this flexibility to maintain proper proportions when worn.
Visors
Visors lack crowns entirely, limiting embroidery to the bill’s fabric panel. This constraint restricts logos to approximately 1 to 1.1 inches tall by 4 to 4.2 inches wide. The narrow vertical space suits horizontal logos, simple icons, or short text that reads well in compressed formats.
If you want to explore more hat styles and their unique characteristics, read this comprehensive types of hats guide for detailed information on every hat type available.
Recommended Logo Dimensions for Hats
Here's a complete dimension reference for all main hat placements. These measurements represent industry standards based on embroidery capabilities and aesthetic best practices developed through years of production experience.
|
Placement Location |
Width Range |
Height Range |
|
Front Panel (Structured) |
4–5 inches |
2–2.25 inches |
|
Front Panel (Unstructured) |
3.5–4 inches |
1.75–2 inches |
|
Side Panel |
2–2.7 inches |
1–1.25 inches |
|
Back Center |
2.5–3.5 inches |
1–1.5 inches |
|
Back Arch Text |
4–4.25 inches |
0.5–0.75 inches |
|
Patch Logo |
Up to 5–5.5 inches |
Up to 2.5 inches |
|
Minimum Text Height |
N/A |
0.2–0.25 inches |
These are guidelines that work for most situations. Always verify with your manufacturer and test samples before large orders. Consider your specific hat style and account for your logo's unique shape and complexity. What works perfectly on one hat type may need adjustment for another.
What Are Common Hat Logo Placement Mistakes?
Understanding common sizing and placement errors prevents production issues and poor results.
Crossing Panel Seams
The biggest mistake is stitching over seams. Seams cause needle breaks, uneven stitching, and tension problems. Always center logos on single panels and leave at least 0.25 inches from seams. If your design reaches a seam, make it smaller instead.
Text That’s Too Small
Text smaller than 0.2 inches is often unreadable, even if stitchable. Tiny URLs, taglines, or legal text rarely work. Increase text to 0.25 inches minimum or remove it entirely.
Incorrect Height Placement
Logos too high bump into air holes; too low crowd the brim. Center vertically, 0.5–1 inch above the brim, for balance and visibility.
Overcrowding the Front Panel
Too many elements or oversized designs look cluttered and unprofessional. A single, well-placed logo is stronger. If you need more, distribute branding: front for main logo, side or back for secondary info, website on back arch.
Custom Hat Branding Ideas for Businesses
Innovative custom hat branding ideas help your hats stand out from competitors and create memorable brand experiences.
-
Dual Placement Branding: Combine front and back embroidery, primary logo on the front, complementary elements like taglines, URLs, social handles, or motivational phrases on the back. This maximizes brand exposure without overcrowding.
-
Side Emblem Embroidery: Small logos or icons on side panels offer a modern look while keeping the front clean or featuring different designs.
-
Back Slogan Placements: Add short motivational phrases, brand mantras, or taglines (3–6 words) on the back arch to enhance the look.
-
Patch + Embroidery Combinations: Use a woven or embroidered patch as the main front logo, then add flat embroidery on sides or back. The contrast adds texture, sophistication, and perceived value.
How Much Does Logo Size Affect Production Costs?
Logo sizing directly impacts production costs through stitch counts and production time.
Stitch Count Pricing Structure
-
Industry standard: $1 to $3 per 1,000 stitches
-
Simple logos (1,000-5,000 stitches): $6-$15 per item
-
Medium complexity (5,000-10,000 stitches): $15-$30 per item
-
Complex designs (15,000+ stitches): $30-$45+ per item
-
Each solid square inch: ~2,000 stitches
Multi-Placement Cost Impact
-
Single placement (front only): base price
-
Two placements (front + back): 60-100% increase
-
Three placements (front + side + back): 130-200% increase
-
Each location requires a separate setup and production time
Patch vs Direct Embroidery Economics
-
Simple direct embroidery: $8-15 per item
-
Patch creation + application: $12-20 per item
-
Complex direct embroidery (if possible): $25-40 per item
-
Complex design as patch: $18-28 per item
One-Time Digitizing Fees
-
Simple text designs: $3.95-$20
-
Standard logos: $6.50-$40
-
Complex designs: $50-$100+
-
File reusable for all future orders
Start Designing Your Custom Branded Hats Today
We offer professional customization services for hats, perfect for business branding, promotional campaigns, or retail sales. Our process makes it simple: upload your logo, choose placements, select thread colors, and specify quantities. We handle digitization, production, and quality control to ensure every hat meets high standards.
Test samples before placing bulk orders to confirm logo sizing, thread colors, and overall appearance. Our expert approach ensures your branded hats have maximum impact, clear readability, and premium quality, creating merchandise people actually want to wear.
Frequently Asked Questions
Standard hat logo size is 4 inches wide by 2.25 inches tall for structured caps. For dad hats, use 3.5-4 inches wide by 1.75-2 inches tall.
Logos should be placed front center, 0.5 to 1 inch above the brim, centered between air holes. Side panels and back arch are secondary placement options.
Maximum embroidery size is approximately 5 inches wide by 2.25-2.5 inches tall for front placement. Trucker hats can accommodate up to 6 inches wide.
Minimum embroidery text size is 0.2 to 0.25 inches tall for sans-serif uppercase letters. Lowercase needs 0.25 inches minimum, serif fonts need 0.35 inches.
Choose patches for intricate details and complex designs. Choose direct embroidery for simple logos, better durability, and lower costs on basic designs.
Yes, structured hats accommodate taller logos (2.25 inches) while dad hats limit height to 1.75 inches. Trucker hats allow wider designs up to 5-6 inches.
Common mistakes include crossing panel seams, using unreadable small text, incorrect height placement, and overcrowding the front panel with too many elements.
Larger logos require more stitches, increasing costs. Simple logos cost $6-15, while large complex designs reach $30-45+ per item at $1-3 per 1,000 stitches.
Leave us a comment